Device Control with INDI and PixInsight
Since 2016 PixInsight officially supports the INDI protocol for controlling astronomical devices such as CCD cameras, filter wheels or telescope mounts. The code is open source and was developed between 2012-2016. It is part of the PixInsight PCL github repository so that installation and updates are delivered with the PixInsight update system. The motivation for integration the INDI control technology into the PixInsight image processing platform is
- The INDI library supports remote control and runs on Linux which is the main platform for smard-card sized computers like the raspberrypi.
- TwoPixInsight is an extensible image processing platform which allows to implement worklfow steps efficiently in C++. In addtion it contains a Javascript runtime which allows to orchestrate all workflow steps with Javascript scripts.
- Combining capabilities of an image processing platform with device controllers enables to write new features, e.g. using plate solving for easier telescope alignment or automatically centering of astronomical objects.
In the following I'll describe the necessary steps to start all required components for getting started with the PixInsight INDI client.
Starting the INDI server
You can run the INDI controlling system in two configurations:
- Locally: Client and server run on the same machine.
- Distributed: Client and server run on different machines, and the client connects to the server over an existing LAN or WLAN network.
Both configurations require an INDI server installation on a Linux or Mac machine. There is currently no native INDI server executable on Windows OS. However there is a wrapper server wINDI which acts as a INDI server proxy for ASCOM devices. In general the server host must be the computer where the astronomical devices are plugged in. More detailed information about the installation of the INDI components can be found here.
After successful installation of the INDI libraries on the Linux or Mac server host, find the installed device drivers under the default installation directory. On Linux for example
myUser@myServerHost>ls /usr/bin/indi*
Then start the indiserver with the drivers which belong to the devices which are connected to your server host. For example: the driver indi_eqmod_telescope, indi_atik_ccd, and indi_asi_wheel can be used for controlling the a SKaywatchter EQ mount, a ATIK ccd camera, and a ZWO usb filter wheel.
myUser@myServerHost>indiserver -l -v indi_eqmod_telescope indi_atik_ccd indi_asi_wheel
If you want to run a simulation without real devices connected use the simulator drivers which are available for each type of device (telescope, ccd, filter wheel, ...) . After starting the indiserver you should see the following
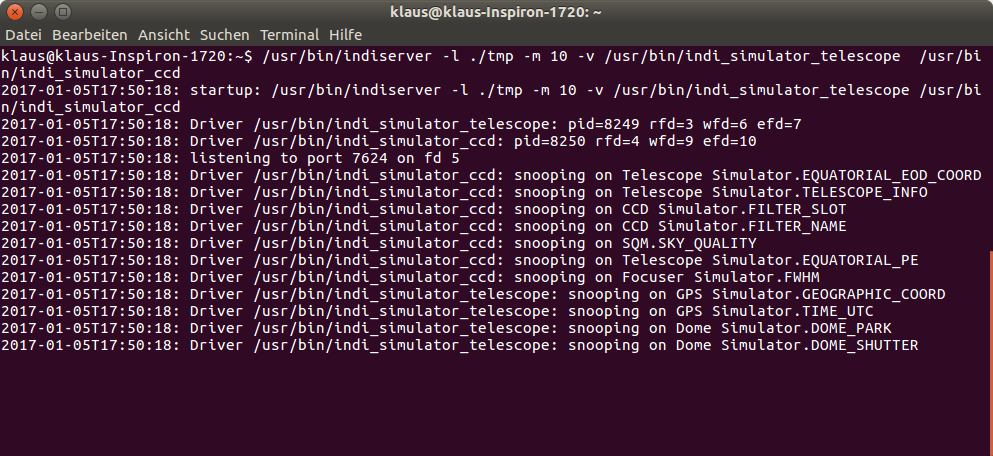
The server listens to port 7624 by default, you can change it by specifying another port explicitely with option -p. The amount of bytes transferred between the server and client is limited to 64 Mbyte by default. Increase that threshold with option -m.
That is it. Now start the INDI client and acquire your first CCD frame: